How to Upgrade Your Clients' Apparel with Elevated Embroidery
“Everyone loves embroidery because it’s durable and high quality – and has one of the highest perceived values of all the options we offer,” says Artem Ionitsa, president of Logo Unlimited. “But there are lots of tactics to take it to the next level. Having thicker lines or bolder colors, or mixing embroidery methods, are great ways to elevate your design’s appearance and quality.
Have you been wondering what “elevated embroidery” looks like? We asked some of the most experienced digitizers and embroiderers around to share their expert techniques, from laser embroidery patches to 3-D stitching.
Life’s Better With Lasered Leather Patches
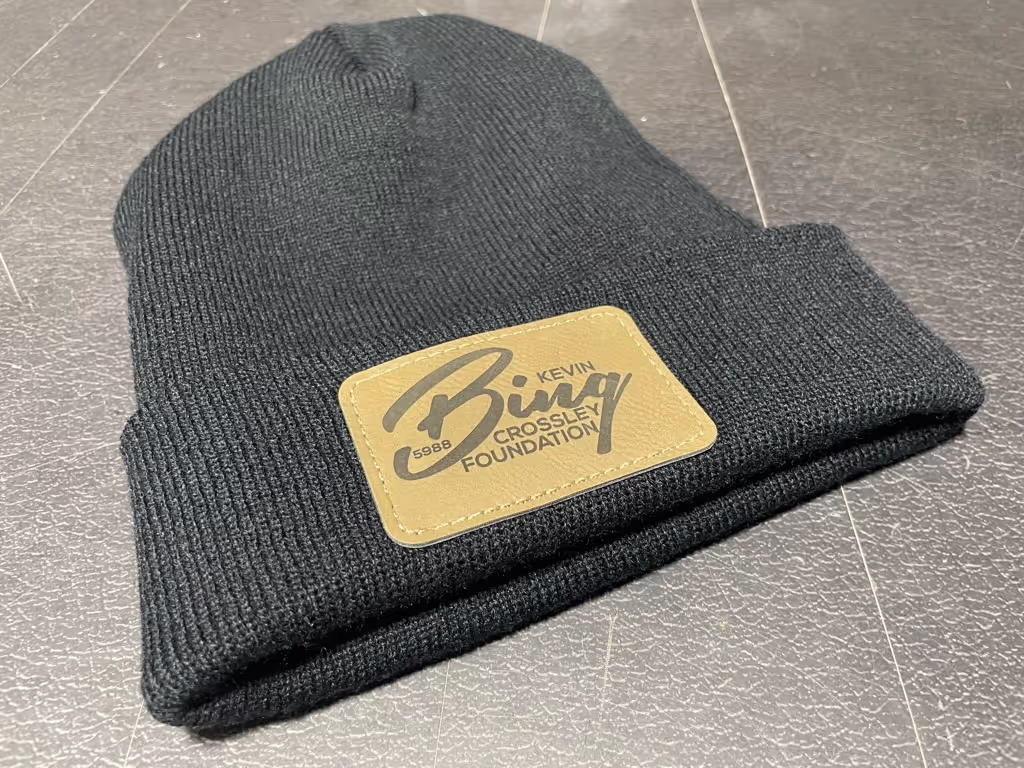
A&P Master Images invested in 2-D and 3-D lasers to create leather patches to sew on winter hats and other products. “We created these patches (shown above) for a memorial event for a deceased police officer.” For this type of embroidery, you just need a sewing machine. Potter’s team produced 220 of these laser-patch winter hats in less than 3.5 hours. “This decorating method gives an item a higher-end look and quality, while looking clean and classy,” he says.
“Laser engraving gives embroidered products a much higher perceived value.”
- Howard Potter, CEO of A&P Master Images
Try 3-D Embroidery on Hoodies
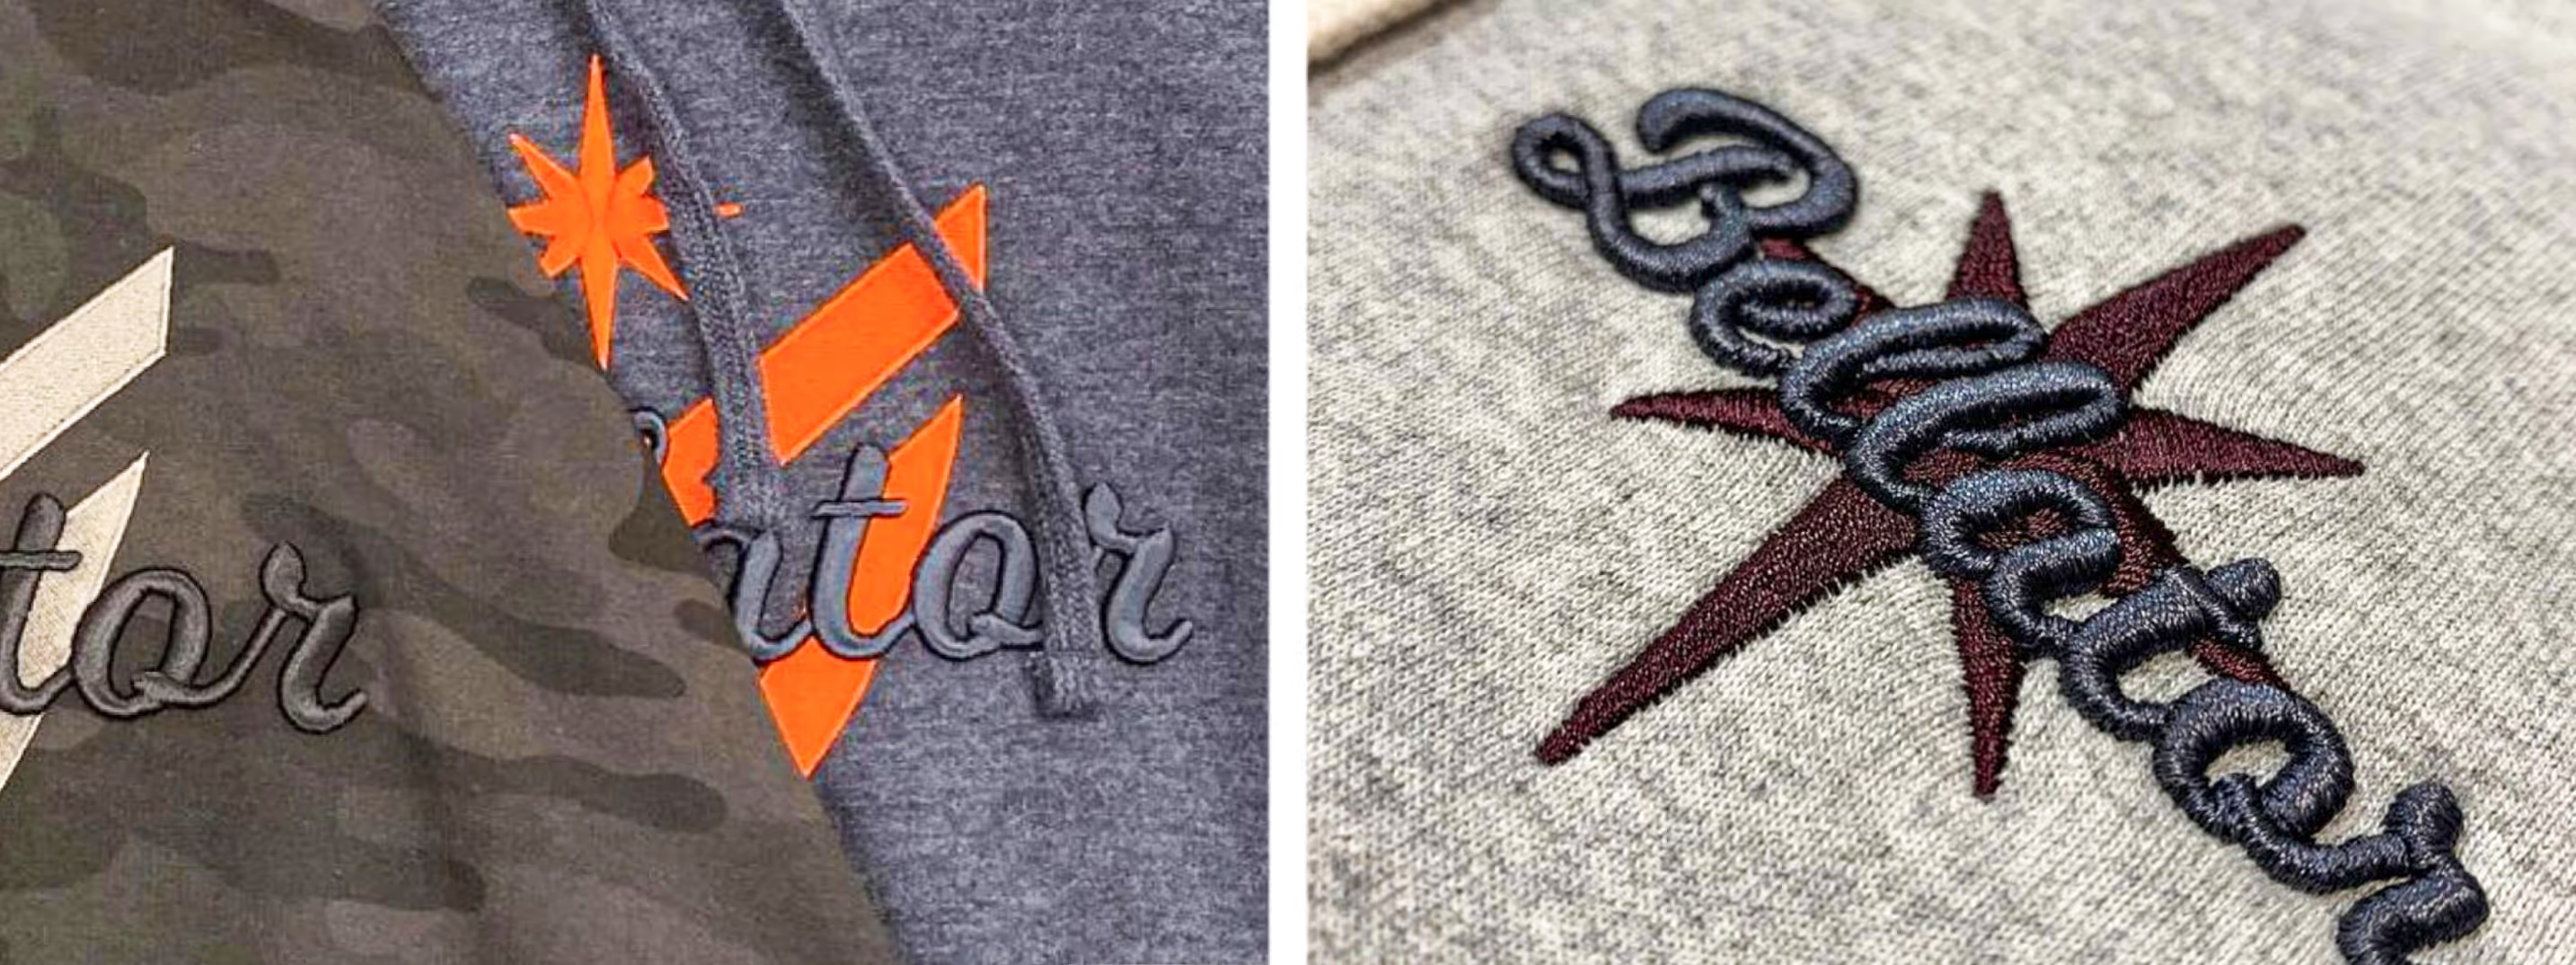
Master Nymph is one of the most exclusive and high-quality fly-fishing companies out there. The brand contacted Logo Unlimited for high-quality embroidery on hoodies to sell in their online store. Ionitsa’s team combined flat embroidery with 3-D embroidery to give a next-level premium feel to Master Nymph’s hoodies.
Logo Unlimited focuses on offering customizable embroidery. The shop recently invested in Tajima TMAR-KC Type 2 machines with a digitally adjustable presser foot. “A presser foot keeps fabric from rising and falling as the needle passes through it to embroider,” Ionitsa says. “By adjusting this setting, we customize the foot to embroider any type of material and keep it as flat as possible. This allows us to produce a higher quality of embroidery, than if we used older machines.”
A few of Ionitsa’s pointers for running 3-D embroidery include:
- Run your machine at a lower rate of speed than normal.
- Use ballpoint needles to help tear the foam better.
- Always test a sample on the same material as the job you’re going to run.
- Use a heat gun or hair dryer after embroidering to get rid of the excess foam that may stick out of the gaps in the thread.
Take Notice of Trapunto

Logo Unlimited also offers Trapunto, one of the coolest forms of embroidery. “This embellishment option is a unique quilting/embroidery technique,” Ionitsa says. “We stuff the space between the fabric and backing with a foam to create a design that looks 3-D just from running a stitch line around the edges of the design.”
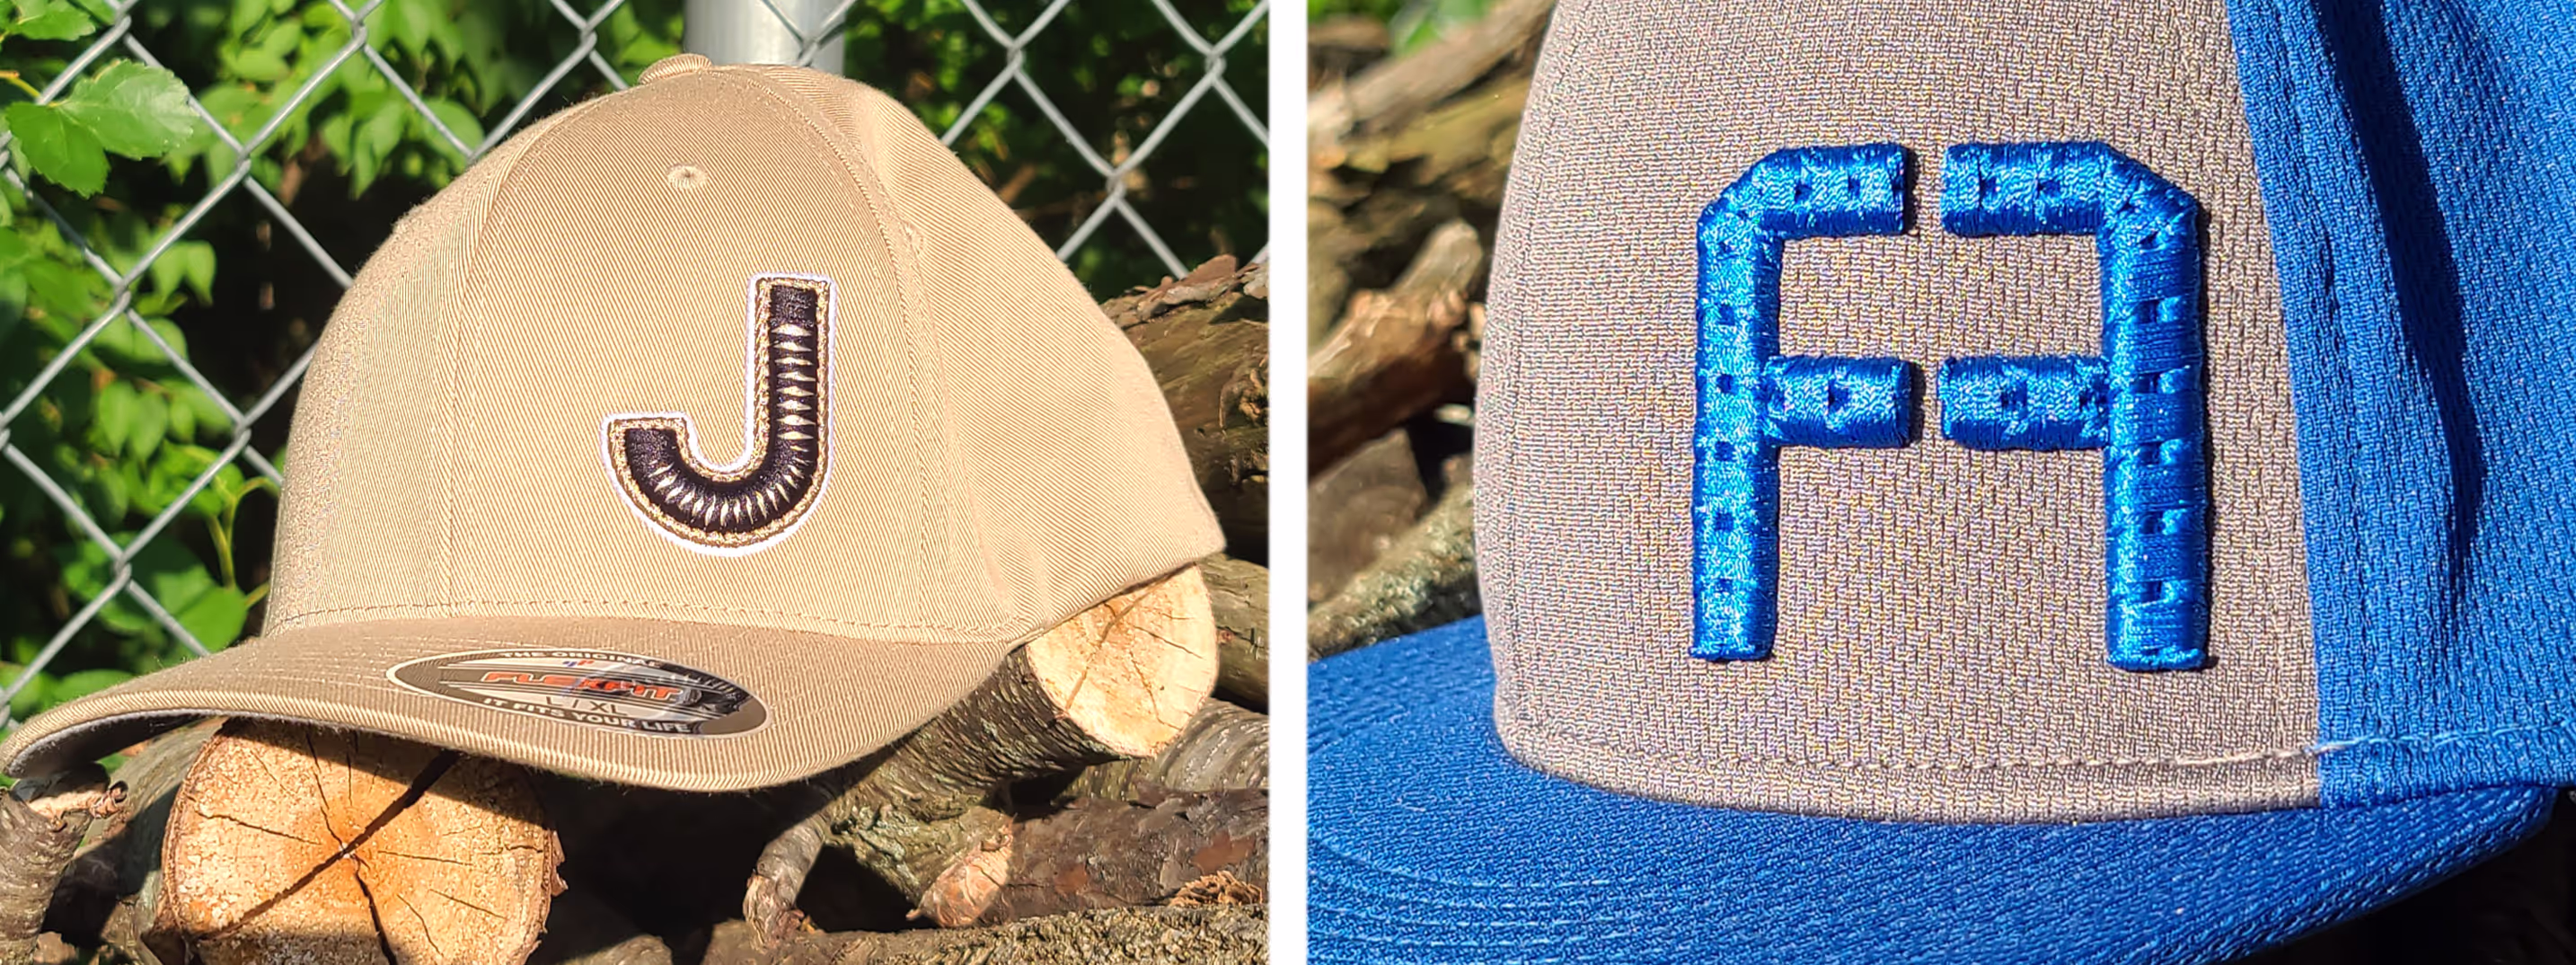
A Dog’s Life With Puff Embroidery
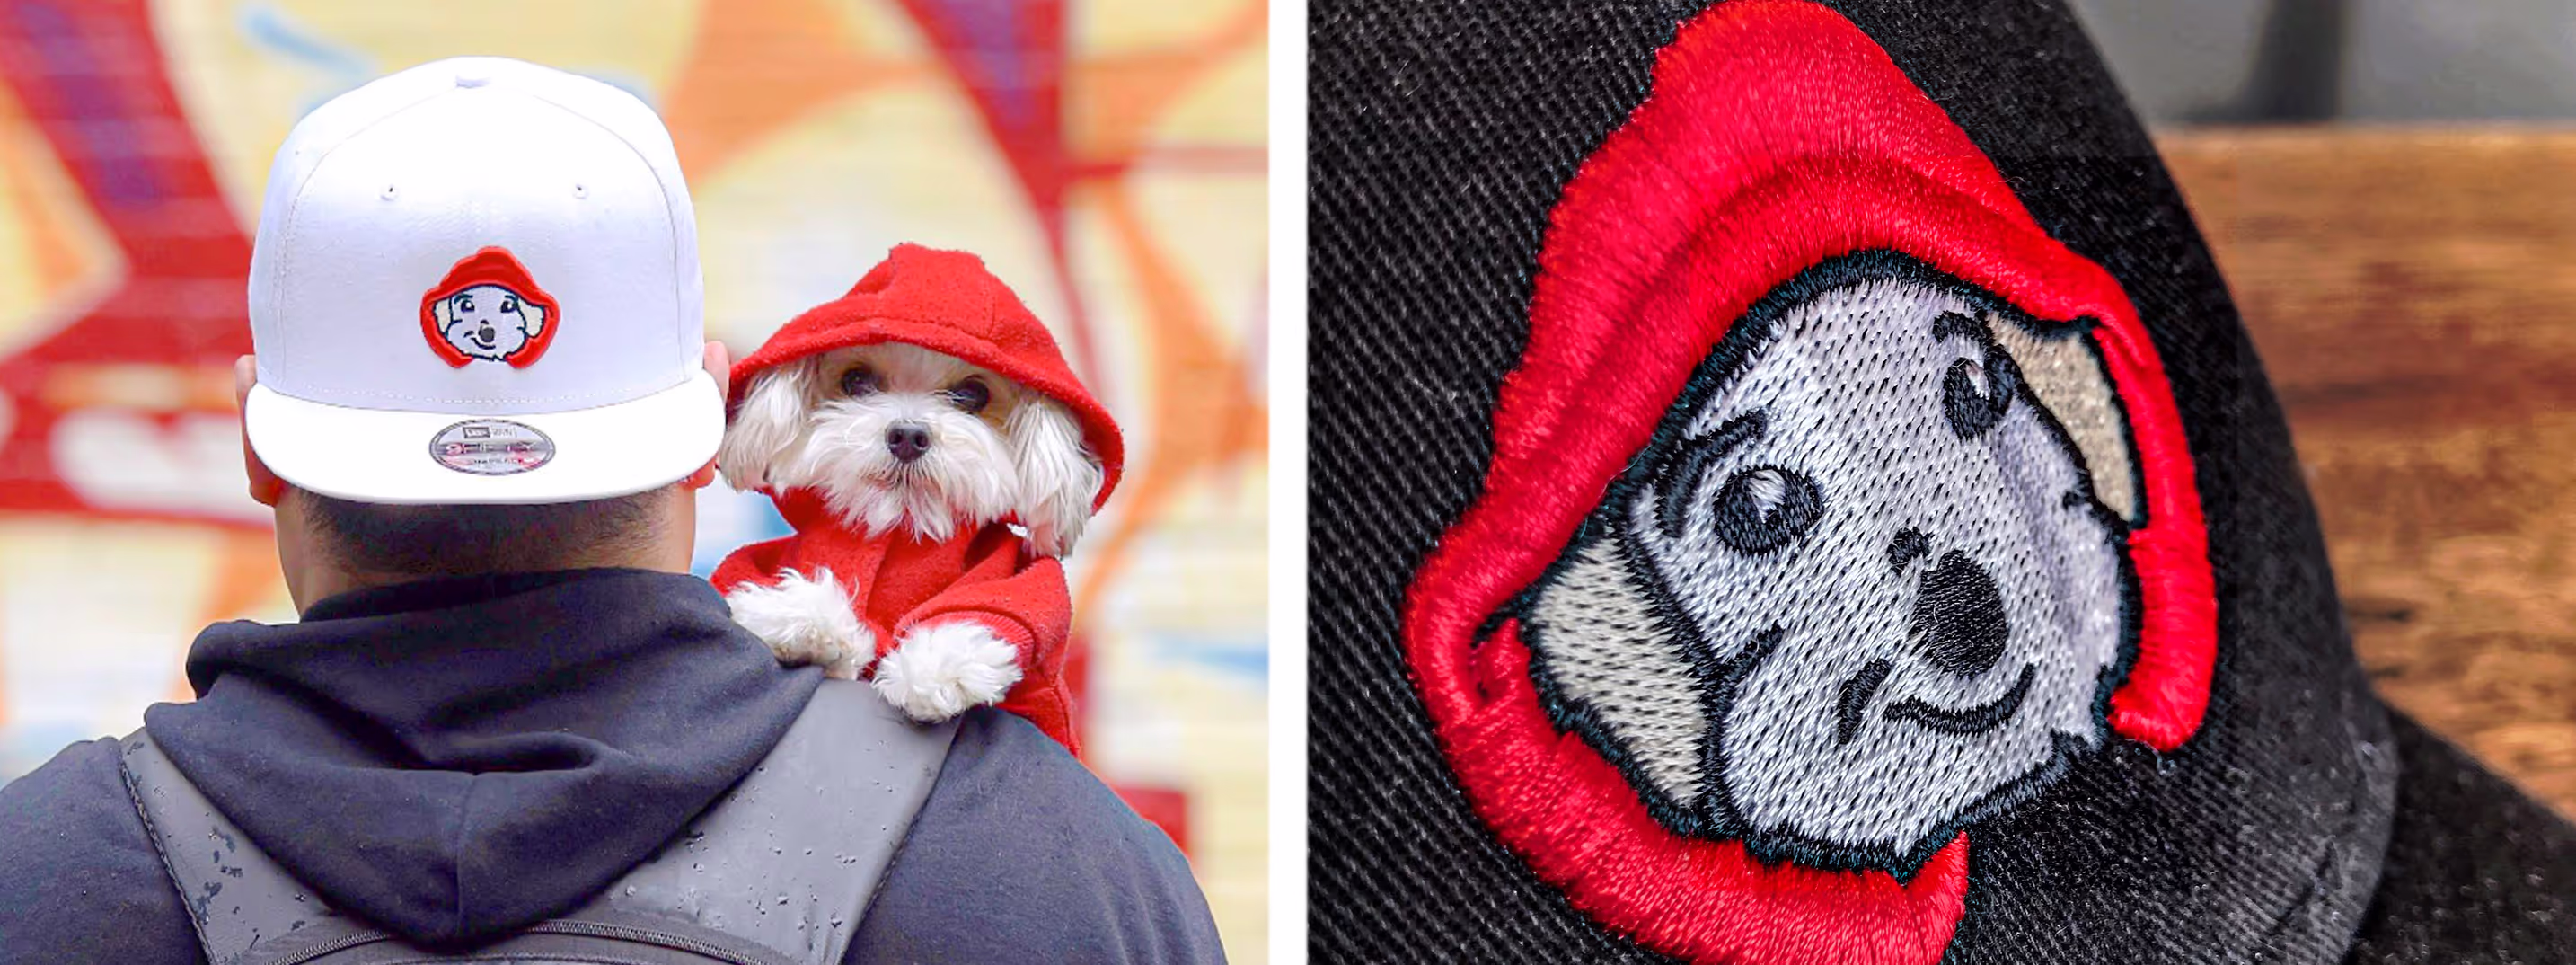
Herman the Dog Model loves showing off caps and hoodies (along with his owner) on Instagram. Kortni Remer, general manager at Broken Arrow T-Shirt Printing & Embroidery, created one of her favorite puff designs for Herman, who travels with his human on adventures around the world. “My client wanted to create cool merch for his brand, which is his dog wearing various hoodies,” she says. “We used flat embroidery for the dog’s face, but then puffed the hood to create a 3-D effect that matched the dog’s look perfectly. The customer loved the result and ordered hats with all of the different hood colors the dog wears.”
Pro tip: If you aren’t familiar with doing puff, find a digitizing company experienced in the medium. “Remember, not all designs are good candidates for puff embroidery,” Remer says. “If the design isn’t puff-friendly, we tell the customer we’ll get a better result matching their logo with flat embroidery. Puff embroidery offers a higher-end, retail look over more common flat embroidery.”
Here are Remer’s suggestions for mastering puff:
- Adjust tensions on your embroidery machine. “Our puff tension is looser than standard, flat embroidery,” she says.
- Use a tack-down stitch on puff sections before sewing so it stays in place during embroidering.
- Sew puff sections last when you’re combining it with flat embroidery.
- Place stops in your machine files between the standard and puff embroidery so the operator can add the puff in the middle of the run.
- Add caps to squared edges to make them look crisp. “It looks best when we can get the caps perfectly aligned with the end of the shape,” she says.
Top It Off with Amazing Lettering
Expert embroiderer Jeff Fuller, owner of Fuller Embroidery Works, regularly creates 3-D puff embroidery fonts by hand that people can purchase and use in their cap embroidery for stand-out looks. "These fonts allow everyone in the industry to add this to their wheelhouse," he says.
Fuller created a custom 3-D reverse applique look on stylish caps for the client’s promotional campaign. “They want to add reverse applique to their lineup soon,” he says. “You can use special fonts like the ones I create, and they come out extremely well on caps. Anyone in the industry can add distinctive cap lettering to their wheelhouse.”
Pro tip: See the potential of a logo vs. just stitching what’s there. “When stitching, consider the different materials and the process to achieve the final product,” Fuller says. “Properly stabilizing your item throughout the process makes a big difference.”
The Details Are in the Digitizing
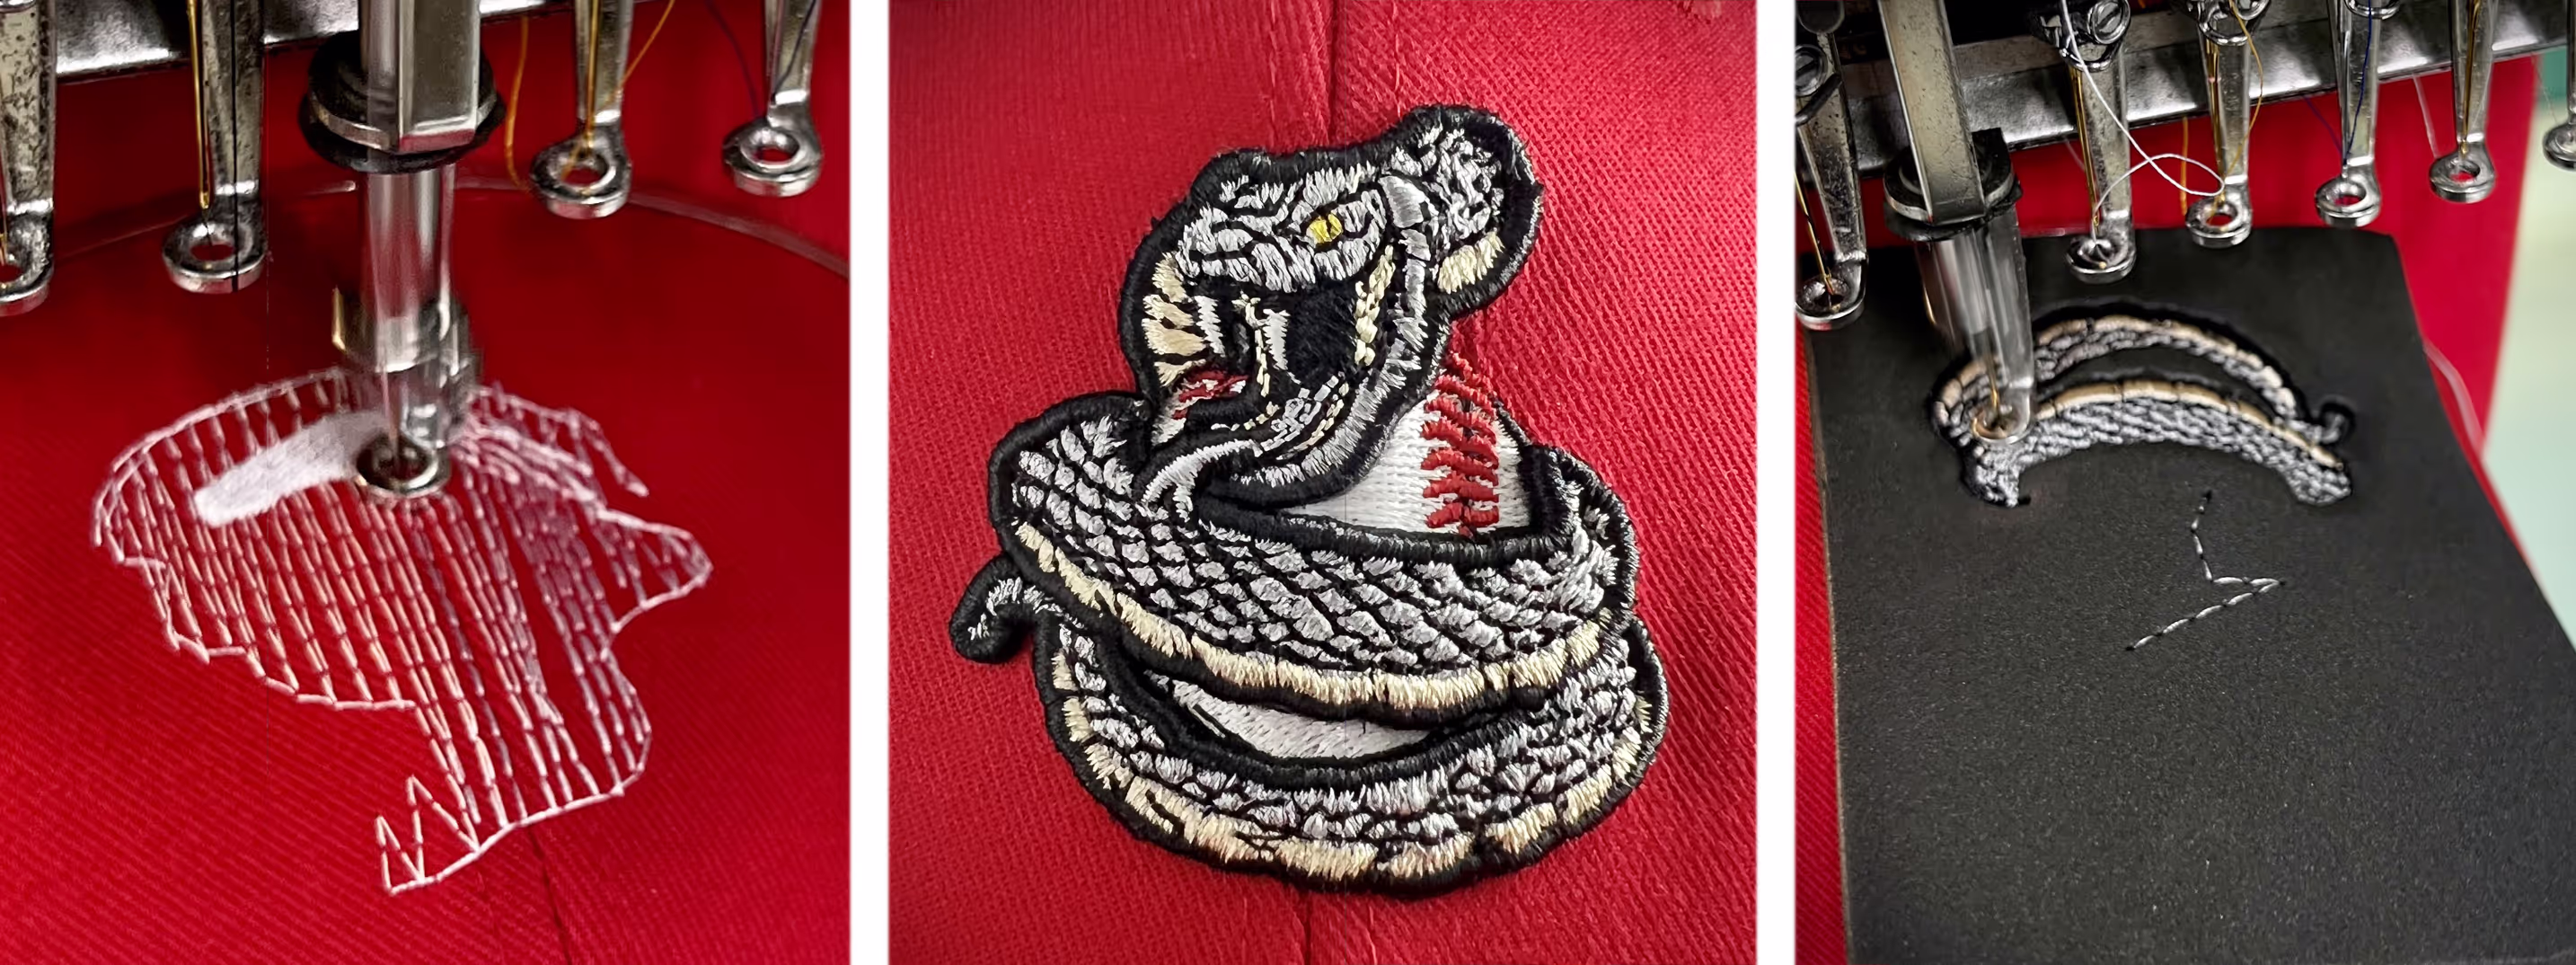
Alisa Davis from Dancing Bay Embroidery contacted digitizer Justin Armenta, owner of JA Digitizing Studios, about a project for a sporting goods store that just wasn’t hitting the mark. The end-customer wanted a 3-D puff embroidered snake design on a hat, using a very intricate, detailed design.
Armenta recommended simplifying the detail, by creating a digitized file for stitching 3-D puff and still keeping the overall integrity of the design. "After sampling, adjusting and resampling, we dialed in the design and ended up with a dynamic 3-D puff logo that worked,” he says.
After analyzing the design and discussing the necessary adjustments, Armenta devised a digitizing plan. He punched the baseball as a flat element to add depth, so the viper is the main focus with some extra “pop.” “I simplified the ball detail from white to grays and removed some laces, knowing the foam bulk would crowd these areas,” he says. He also simplified the viper details to include fewer stitches on top of the 3-D foam, but still achieved a realistic snakeskin pattern.
Start Elevating Your Embroidery
Don’t be afraid to try new things. “It’s easy to stay in your comfort zone and do ‘what you know’ – but branching out and trying new ideas and new techniques can put you in a position to offer something that a competitor may not do,” Armenta says. “Elevating your embroidery with a unique look sets you apart and will add a higher-perceived value to any project.”


